|
|
|
|
Page Views: 871 |
| Hashtags: #VisualBasic60 #ProgrammingforMicrosoftWindows |
| Chapter 8 of this free online course in Visual Basic 6.0. |
| Estimated reading time: 17 minute(s) (3945 words) |

Well, here we are in the eighth lesson, and it is finally time to examine
what these objects are that we've been working with.
With object-oriented programming, once the schooner is designed, it can be
treated throughout the program as a schooner. Once the treasure chest is
designed, it can be treated throughout the program as a treasure chest. The
treasure chest can be brought aboard the schooner, but the schooner could not be
brought aboard the treasure chest; because the components would not have been
designed that way.
Now, when the schooner is being designed, it will be designed in terms of
other objects. There will be crew members, sails, anchors, and ship's stores.
Some components of the schooner, such as its name, may be so elementary that it
must be designed in terms of letters or numbers. Realize though, that a name is,
in fact, composed of letters; and so this is still working in an object-oriented
manner.
It's not that traditional programming is not involved. It's that the
low-level programming efforts are directed to the lowest level components of the
objects as they are being designed; once designed, the objects can be used in a
natural, intuitive way.
This has an enormous advantage over linear programming, in that we humans
already organize all reality into objects. We already know how to do this. We
don't have to learn any programming tricks in order to work with objects. We
don't have to think differently than we do in our everyday lives.
Classes and Objects
When we are working with objects, one of the things that we need to do with them is to
create them. In order to create an object, we need to find what the object will
look like and what it will work like. That definition is called a Class.
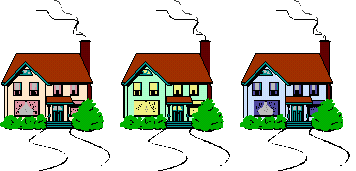
A Class is to an object what a set of blueprints is to a house.
Once a Class has been designed, you can build as many objects as you like
from that Class, in the same way that many houses can be built from the same set
of blueprints. We do have a special word for one manifestation of an object: We
call it an instance.
There are two parts of a Class that are important to distinguish.

Interface
An object's interface is that part which allows the object to interact
with the outside world. Most real world objects have many interfaces: for
example a stereo has an electrical interface, a human interface, and an acoustic
interface. The electrical interface is the power cord that you plug into the
wall socket. The acoustic interface is the speaker system; pulsations in the
speaker interact with the air, making it possible for us to hear the music the
stereo is playing. The human interface includes the tone arm or the buttons and
knobs we use to control the device.
It is not important to know how the interface is implemented, to use it. Many
people do not know the diameter of the laser beam or its exact wave length and
yet they can play a CD with no problem.

Implementation
The second aspect of an object is its implementation. The
implementation is what makes the interface work. Without the implementation, you
have an attractive box with knobs and buttons…that doesn't do anything.
An implementation without an interface is just a bare circuit board, without
any way of making it work.
The details of an implementation should not be visible to the object's
clients. While a few people like to buy those telephones made of transparent
plastic, most of us prefer our implementation details to be kept neatly out of
sight.
More On Interfaces
It is possible to completely describe any object using just three types of
interaction:
- Properties (nouns)
- Events (happen to the object from outside)
- Methods (verbs, used to respond to events)
Properties
At their simplest, properties are variables that are associated with an
object. Think of them as nouns. They are quantitative values that describe what
the object looks or works like.
For example, in a house object, the exterior color is a property. The space
in the computer's memory in which a Property lives remains allocated as long as
its object is allocated.
Properties are declared in the (General)(Declarations) section of a Class
Module. They can be declared either Public or Private. Public
properties are part of the object's interface; Private properties are
part of its implementation.
Options Explicit
Public I_Am_Interface as Integer
Private I_Am_Hidden as Integer
Some programmers declare the Public properties first, then the
Private
ones; others prefer to group related properties together regardless of
whether they are Public or Private.
Events
Events are things that happen to an object from outside. For example,
a button can be clicked; a treasure chest may be opened; a form may be loaded
into memory.
Not every object reacts to every possible event. For example, nearly every
object ignores the "being penetrated by neutrino" event.
To react to an event, the object implements an event handler, which is
a special type of method. (We'll look at methods in just a moment.) It is also
possible for an object to cause events that can be detected by other objects in
the application.
Methods
A method will look to you like a regular procedure. They are
implemented as blocks of code. Most commonly, methods read or modify an object's
properties. As just stated, a method that reacts to an incoming event is called
an event handler.
Object Syntax
We use the "dot" syntax to access object properties and methods.
Copy the Width property of the Screen object into the variable
W:
w = Screen.Width
Use the Print method of the Printer object to display the
string, "Hello world!":
Printer.Print "Hello world!"
Assign the string, "My caption!" to the Caption property of the
MyLabel control object on MyForm:
MyForm.MyLabel.Caption = "My caption!"
Forms as Objects
While Microsoft documentation goes on and on about class modules being a way
to implement an object, in fact, the only kind of module in a Visual Basic
application that does not create an object is a code module.
In other words, a form is a type of object.
Even a blank form is an object; but the moment you put the first control on
it, or write the first line of code, you have a programmer-defined object.
You could say that the bare form, a type of object, is enhanced by the
additional controls and code you add.
Enhancing an existing object is a fairly common part of object-oriented
programming.
For example, we have our About form. It already displays information about
the application; it can be used as a proper About box and it is even reusable.
But we can make it better.
We can enhance it so that it doubles as a splash screen.
A splash screen is an introductory form that appears while an application is
initializing. The information it displays is usually the same as is displayed on
an About box. So, why have two forms to do the work of one?
The challenge will be to add the splash screen capability without
breaking the previous behavior of the about box—and to do this while
keeping the interface simple!
Once you have seen the need for an object, the next step is to
design its interface. It's important to design the interface first,
because that's the part that is going to have to interact with the
rest of the application.
For example, in our quest to enhance the About form to be a splash screen, we
have to identify what it is that makes a splash screen different from an about
box. There are two things. First, a splash screen appears while the rest of the
application continues to initialize. Technically, that makes the splash screen a
modeless dialog, rather than a modal dialog. Secondly, a splash screen usually
has a progress bar that shows how much of the initialization has completed.
The presence of this progress bar suggests how we can easily identify the use
of our form as a splash screen. A progress bar needs to know how many
initialization steps there are, and how many have already been completed. So, if
we add a TotalSteps property to the About form, assigning a value to that
property will also signify that the form is to be used as a splash screen.
Each time a step is completed, we can call a method called CompleteStep.
When CompleteStep has been called once for each step identified as the
number of TotalSteps, the form can remove itself from view.
Thus, as far as the interface is concerned, by adding just one property and
one method, we can have use of a splash screen without altering the way the
About form works as an about box. That satisfies our goal of enhancing the
behavior without unnecessarily complicating the interface.

ProgressBar
When Windows first came out, every time we needed a progress bar, we had to
write one ourselves. Fortunately, progress bars are among the many, many
controls Windows gives us for free, and that Visual Basic supports.
Although the ProgressBar is not one of the controls built into Visual Basic,
it is easy to add. Either right-click on the toolbox, or drop down the Project
menu and click on Components. Either way you'll get a dialog box that lists all
available ActiveX component packages on your computer. Locate "Windows Common
Controls 6.0" and put a check mark by it. When you click the OK button, you'll
find several additional controls have been added to the tool box. One of them
will be the ProgressBar.
The ProgressBar visually displays a percentage from zero to one hundred. You
don't even have to do the math; simply set the Min property, the Max
property, and the Value property; and the ProgressBar will do all the
work.
After you've added a ProgressBar to your toolbox, place the ProgressBar on
your About form in the usual way. Remember, you want the About form, when being
used as an about box, to work exactly as it did before. So go to the Property
Window and set the ProgressBar's Visible property to False.
Property Procedures
We've seen Property variables, but as it turns out most of the
properties that you build it into an object are going to be
implemented as property procedures.
In linear programming, it was common to have a variable with global access,
which therefore could be changed anywhere in the entire application. Every
time it was accessed, it had to be subjected to validation; since it could be
changed anywhere, it could pick up invalid values at any time. That
resulted in a lot of extraneous code that performed no purpose but checking and
re-checking values for validation.
Object-oriented programming provides a far superior method. Through the
use of property procedures, we can control the assignment of values to a
property. We can make sure that when a new value is assigned, it matches
our validation rules. If it does not, we can trigger a Visual Basic
exception. Since we can control values coming into the property, we don't
have to keep re-checking the values when we read them.
Properties implemented as property procedures look like regular Property
variables from outside the object; but inside the object, they look like
subroutines and functions—blocks of code.
Property procedures usually come in pairs. Assignments to a property
are made through Property Let procedures; the reading of a property value
is done through a Property Get procedure. (There is also a Property
Set procedure that we'll deal with, later.) The incoming data type for the
Property Let must match, exactly, the return data type for the Property
Get.
So…when do you use property procedures?
Input validation required
Visual Basic data types are a pretty sturdy lot. A
byte-types variable for example, can hold any value from zero to 256.
If you try to assign of value out of that range to a byte, it will trigger a
Visual Basic exception. However, sometimes the legal values for a variable
lie within the range it can physically hold. That's when you need
to validate incoming values. You do that by providing a Property Let
procedure that triggers a Visual Basic exception if the supplied value is out of
range.
Read-only or Write-only
Sometimes, a property needs to be read-only or write-only. For
example, the Area property of a Rectangle object can reasonably be
referenced but not directly changed. The only way to make a property read-only
or write-only is to implement it through property procedures. If you want it to
be read-only, you supply a Property Get procedure, only. If you want it
to be write-only, you only supply a Property Let procedure.
Output calculation required
Referring back to the Rectangle object, and its Area property,
it makes no sense to store the Area as part of the object when it can be
calculated as needed from the Length and the Width of the
Rectangle. Since such a property should be read-only anyway, its
Property Get procedure can be implemented by calculating the
Length and the Width.
Conversion required on input or output
This reason to go to Property procedures may take longer to explain,
Sometimes, information needs to be stored in one format in one part of the
program, and in a different format in a different part of the program.
For example, suppose you have a program that is dealing with a color. Colors
are normally stored as 32 bit variables in Windows. However, suppose you also
have a dialog box in which the end user selects one of three colors to use. In
that dialog box, you might choose to use option buttons to provide the color
choices to the end user. Inside the dialog box, colors will probably be
represented as a 0, 1, or 2. Outside the dialog box, it will be represented as a
32-bit number. Property procedures in the dialog box are the perfect place and
opportunity to convert to and from the global color representation to the way
colors are represented inside the dialog box.
Object needs to be notified if value changes or is accessed
Sometimes, an object needs to the notified if a value is changed. For
example, in a Label control (which, remember, is an object), if you
change the Caption property, the Label control must find out about
it so that it can redraw itself with the new Caption. In such a case, the
Property Let procedure can notify the object that the property has been
changed. Less often, an object needs to be notified if a value is read; and this
can be done in the Property Get procedure.
Inserting Property Procedures
As with all procedures, you can add property procedures by simply typing
them, pasting them, or using the Add Procedure dialog box. However, the
latter method works especially well in tandem with the splitter window.
Modal vs. Modeless
There are two ways a dialog box can be displayed. The most common is modal,
in which the rest of the application goes to sleep until the user dismisses the
dialog box, usually by clicking the OK or Cancel button. The most common example
of this would be the standard File Open dialog.
The second style of dialog box is called modeless. A modeless dialog
box does not cause the main application to behave any differently while the
dialog is visible. The user can switch back and forth between the main
application window and the dialog at will.
These two styles also change the way the application's code runs. Putting up
a modal dialog box is like making a function call; the code that displays the
dialog freezes until the dialog has been hidden or unloaded, at which point it
then continues. A modeless dialog, on the other hand, does not have this effect.
As soon as it is visible, the code that made it visible continues to execute.
An about box, a normal usage, is a modal dialog box. The main application
freezes until the end user has clicked the about boxes OK button and made it go
away. A splash screen, on the other hand, needs to be displayed in a modeless
manner, in order for the main applications initialization to proceed.
Dialog boxes are displayed via the form's Show method. This method
takes an argument that indicates whether the dialog box is to be shown modal or
modeless. The argument given is one of two easy-to-remember constants (easy to
remember, that is, if you can recall the terms modal andmodeless!):
About.Show vbModeless
Methods
Methods, you'll recall, are procedures that, conceptually are verbs (as
opposed to properties, which are nouns). The syntax for writing them is quite
similar to that of property procedures; one difference, of course, is that they
do not come in pairs.
If…Then…Else
For the method we are about to write, we need to know the syntax if the
If statement.
There are actually two separate syntaxes for this statements. The first is
left over from the early days of BASIC. It is:
If condition Then statement [Else statement]
We looked at conditions in an earlier chapter.
The second, more common and preferred syntax is:
If condition1 Then
    [statementblock-1]
[ElseIf condition2 Then
    [statementblock-2] ]
[Else
    [statementblock-n] ]
End If
The indentation style is recommended but not required.
Please note the lack of the space between "Else" and "If"—and the
presence of a space between "End" and "If"!
Popular Psychology
People have an odd trait (well, many; but just one that concerns us, now).
They will sit and watch a progress bar fill up, and if, just before the bar
reaches 100%, the dialog vanishes, they will feel strangely unfulfilled.
That's why most dialogs that display progress bars pause a fraction of a
second after the bar reaches 100%, to unload themselves.
Here's an interesting aspect of function procedures in Visual Basic.
You'll notice that there is one path through the If statement
that does not set a return value. However, in VB this is
perfectly legal. Remember, all variables in Visual Basic are
initialized to zero, and that includes function return values. So, if
.Value does, indeed, equal .Max, CompleteStep will return a
value of zero as the "current step"—which, since the mechanism will have
reset itself (by removing the form from the screen and from memory), is
a reasonable value.
Reusability
We now have an About box that doubles as a splash screen and can be used,
without further modification in any application.
However, we haven't quite succeeded in our goal of making a truly reusable
About box. The problem is the function DelayFor. We called it in the
CompleteStep function, but the code doesn't live in the About box; it's in the
Globals module we created in an earlier chapter.
To make the About box truly reusable, we have to copy the DelayFor
procedure from the Globals module into the About form's code window. By
changing the keyword Public to Private in the procedure declaration, we can make
this procedure part of the About form's implementation, rather than its
interface.
Should we be concerned about the fact that we have repeated code in this
application? The answer is no. The amount of duplicated code is minimal; and the
maintenance burden that is lifted by not having to remember that the Globals
module must accompany the About form, is a priceless benefit.